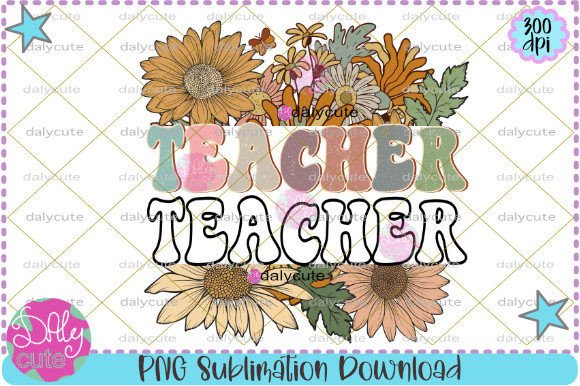
Retro Teacher Back to School Floral PNG: Getting the Most Out of Your Digital Design
You found a charming digital file. It blends vintage classroom warmth with hand-drawn florals and a cheerful back-to-school spirit. The Retro Teacher Back to School Floral PNG is more than just a pretty picture—it’s a ready-to-use asset for sublimation projects, greeting cards, signs, tote bags, and so much more. But a crisp, transparent 4,000×3,000 px file at 300 dpi doesn’t automatically guarantee a flawless finished product. Small oversights in how you choose, test, and apply the art can turn a promising idea into a blurry print or a wasted blank. This guide walks you through the subtle mistakes even experienced crafters make, and how to avoid them, so your final project looks as good as the preview.
Rushing Past the Technical Specs Can Ruin Your Print Quality
Many buyers see “300 dpi” and assume every print will be razor sharp. That’s only true if you respect the native dimensions. The Retro Teacher Back to School Floral Sublimation PNG is delivered at 4,000×3,000 pixels. At 300 dots per inch, that translates to roughly 13.3×10 inches. If you stretch the design to fit a 20-inch pillow without increasing the resolution artificially, the image becomes soft and pixelated. The delicate flower petals and vintage chalkboard lettering lose their crispness.
What to do instead: Measure your blank first. For a standard 11 oz sublimation mug, the printable area is around 8×3.5 inches. This file will scale down beautifully. For a horizontal tote bag panel that’s 14×10 inches, you’ll need to be careful. Either keep the design at its original size and let it float with a coordinating background, or use high-quality resizing tools that add smart detail—but understand the limits. Always do a small test print on regular paper at the intended size to check sharpness before committing to an expensive blank.
Trusting the Transparency Without Checking the Edges
A transparent background is one of the main reasons you choose a PNG. It saves you from tedious clipping. But just because the background is invisible doesn’t mean the file will always lay down perfectly on every colored surface. Sublimation involves a heat transfer that permanently dyes the substrate. If your tote bag is a creamy off-white and the design includes soft ivory floral highlights, those light areas can blend into the fabric and disappear. The charming retro teacher illustration might look like it’s floating with no defined boundary.
Look closely at the floral elements near the edges. Are some petals composed of semi-transparent pixels? That’s intentional for a soft, vintage feel, but on a dark or heavily textured surface, those semi-opaque areas can become muddy or lose their shape. Instead of guessing, open the file in your design software and place it on a simulated background that matches your final product’s color. If anything washes out, consider adding a subtle solid offset outline behind the design, or choose a blank that provides enough contrast—think slate blue mugs, pale pink tote bags, or kraft-style paper for cards.
Forgetting to Mirror the Image Before Sublimation
This mistake is so common it almost feels unfair to mention, yet it catches experienced makers when they’re rushed. The Retro Teacher Back to School Floral PNG may not contain text you need to read, but the composition has a deliberate visual flow. A vintage book stack, an apple, a pointing pencil—these details have an intended left-to-right orientation. If you press a mug or a t-shirt without flipping the image horizontally, the whole scene will be reversed. The floral arrangement might look slightly off, and any subtle contextual cues (like a globe turned the wrong way) can distract.
Always check your print settings just before hitting “print.” Most sublimation design programs have a simple “mirror” or “reverse” checkbox. Make it a habit. Even better, add a small, non-intrusive mark or text in your design file that confirms orientation—like a tiny “R” in a corner that you can remove later, but which tells you immediately if the file has been mirrored. This small step saves costly blanks and the frustration of a design that’s almost perfect but noticeably backwards.
Treating Every Sublimation Blank Like It Needs the Same Color Profile
Digital files display vibrant, glowing colors on your screen. The transfer process into a physical item involves ink, paper, heat, and the specific coating on your substrate. What looks like a soft coral peony on your monitor can turn into a hot orange blob on a polyester t-shirt if your color management is ignored. The Retro Teacher Back to School Floral Sublimation PNG relies on a warm, muted palette to deliver that nostalgic educator vibe. Boosting saturation or printing with a mismatched ICC profile can transform the delicate vintage aesthetic into something loud and cartoonish.
Avoid this by working in a color-managed workflow. If you don’t have a custom ICC profile for your printer and blank combination, use the generic profile provided by your paper or blank manufacturer. Print a small swatch test, not the full design, on a similar piece of fabric or an inconspicuous area. Pay special attention to the greens of the leaves and the pinks of the florals—these are the colors that tend to shift the most. Let the test print cool and cure as you would the final product, then compare it under natural light. Adjust your source file’s hue and saturation only after seeing a live reference, never based on screen alone.
Ignoring the License Terms Before Selling Finished Products
You’ve purchased a digital file. You now have the right to use it. But the scope of that right matters enormously for entrepreneurs, teachers selling classroom decor bundles, and small business owners. Some commercial-use licenses permit physical product sales with no print limit, while others cap the number of units, require attribution, or forbid use on print-on-demand platforms. Assuming “I bought it, so I can sell it however I want” can lead to takedown notices or strained relationships with designers.
Before you list that adorable back-to-school tote bag in your online shop, open the download folder and locate the license document or the product description page. Look for terms like “personal use only,” “small commercial use,” or “extended commercial license.” If you plan to produce hundreds of greeting cards or sell sublimation transfers to other crafters, you might need a different tier. When in doubt, reach out to the seller. Most digital art creators are happy to clarify. Protecting your business means being as meticulous about usage rights as you are about your press temperature.
Forcing a Square Peg Into a Round Hole With Poor Layout Choices
The Retro Teacher Back to School Floral Sublimation PNG has a rectangular, landscape-inspired composition. It works wonderfully as a full-bleed design on a wide card or as a centered feature on the front of a tote bag. But problems arise when crafters try to make one design serve every product without adapting the layout. Cramming the entire 4,000×3,000 pixel rectangle onto a tall, narrow mug wrap can crop out key details or create awkward empty spaces at the top and bottom. The alternative—squishing the artwork to fit—distorts the carefully proportioned floral wreath and the retro teacher illustration.
Instead, think of the PNG as a flexible asset. You can crop into a square format for a coaster, or isolate just the floral border without the central teacher figure for a bookmark. Use your software’s masking tools to fade the edges into a new background color if you need a different format. For mugs, consider a wraparound approach where the design repeats or blends into a complementary pattern. A little extra time spent adjusting the composition for each product type prevents that handmade look from feeling haphazard.
Overlooking the Importance of a High-Quality Print Environment
Even a flawless 300 dpi file can’t compensate for a dusty printer head or low-quality sublimation paper. Blurry transfers, banding lines, or colors that wash out after a single wash often get blamed on the digital art, when the real culprit is the printing process. The Retro Teacher Back to School Floral PNG deserves a clean, well-maintained workflow. If your nozzles are clogged, tiny floral details can turn into streaky blobs. If you use cheap paper not meant for your ink, the transfer might be pale and uneven, losing the rich depth of the vintage palette.
Before running a batch, perform a nozzle check. Use sublimation paper recommended for your printer model and ink. Let the printed transfer dry completely before pressing; damp ink can cause smearing or gas out during pressing, creating a ghosted effect. And press with consistent, even pressure. For home-based creators, a small heat press tends to give better results than a household iron, especially for thick blanks. The extra investment in good habits pays off in deep, durable colors that make that retro teacher artwork pop.
Trusting a Digital Mockup More Than a Real Sample
Mockups are inspiring. They show the design on a beautiful mug, a tote bag, a framed sign. But they’re also idealized representations. A mockup won’t reveal how the colors interact with the slight texture of a polyester tote, or how the design feels against a matte versus glossy mug coating. Relying solely on a mockup to approve your final product can leave you disappointed when the real thing lands in your hands.
Make one physical sample before you produce inventory or gifts. Use the exact same blank you plan to use in bulk. Note how the art’s lighter tones hold up, whether the transparency edges look natural, and if any part of the design gets lost in seams or folds. For greeting cards, check the printed size against a common envelope. This sample not only catches mistakes but also helps you photograph your product for your shop or social media, showing buyers exactly what they’ll receive. It’s a confidence-builder that turns a digital file into a tangible, trustworthy product.
A Quick Pre-Use Checklist for Your Retro Teacher Floral PNG
Before you click “print” or start designing, run through these checks to save time and materials:
- Verify actual dimensions and resolution. Open the file in your editing software and confirm it’s a true 4,000×3,000 px image at 300 dpi with no hidden background
- Test transparency on the intended background. Place the PNG over a digital swatch that matches your blank’s color
- Confirm license terms. Ensure your planned use (personal, small business, mass production) falls within the allowed scope
- Mirror the design. Double-check your print dialog or design canvas orientation
- Size and position carefully. Make sure no critical elements will be cut off by seams or mug handles
- Print a small test patch. Check color accuracy, sharpness, and edge behavior on a cheap piece of fabric or paper first
- Prepare your press. Set the correct temperature, time, and pressure for your specific blank, and ensure you’re using compatible sublimation ink and paper
The Retro Teacher Back to School Floral Sublimation PNG is a thoughtfully crafted piece of digital art that can elevate anything from a simple postcard to a cherished teacher appreciation gift. Treating it as a flexible, high-quality starting point—rather than a one-click solution—lets you avoid the typical pitfalls that lead to fuzzy prints, mismatched colors, and licensing headaches. When you pay attention to sizing, color profiling, layout adaptation, and printing conditions, that vintage educator charm transfers exactly as you imagined: warm, crisp, and full of personality. A little bit of mindful prep transforms a PNG download into a finished product that feels intentional, professional, and completely worth the effort.